Teaching Children to Read in 5 Easy Steps
Teaching children to read is easy when you follow a step by step method. Your child does not even have to know the whole alphabet.
Sometimes kids get overwhelmed when you ask them to learn all the alphabet letters at once.
You can teach your child to read using four consonants ( m, p, s, t) and one vowel (a). That’s all you need!

Learn to Read
Using just these five letters is enough to start building the reading pathways in the brain.
This wonderful brain of ours takes a little bit of information and automatically starts making files or pathways in the brain with the information. Then the brain uses that file or pathway and applies it to all future learning.
When your child learns how to make and read words with these five letters, their brain will automatically apply that information to all the future letters and sounds he or she learns.

Easy Alphabet Sounds
Ok, why these particular letters you might ask. These letters make distinct sounds so they sound different from each other. They are also made differently in the mouth. I won’t get into why this is important but I’ll just say that they are the easiest sounds in the alphabet for a child to learn first and remember.
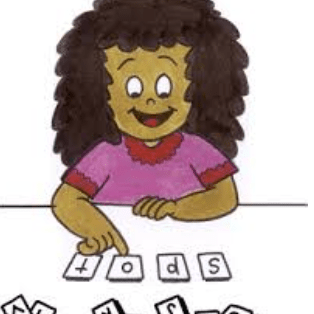
Start your instruction by writing each of these letters in the lower case format on index cards. Write the four consonant sounds using a black marker. Write the vowel using a red marker. This way we start to distinguish the vowel as being a little different. Every word we make as at least one vowel in it.

Practice Phonics Flash Cards
Ok, let’s go – Step 1 – Practice each alphabet sound using these phonics flash cards. Say the sound first and then ask your child to repeat the sound after you. After a few practice rounds, hold up the card and see if your child can say the sound on his own. If not, help him out by saying the sound and having him repeat after you.
After practicing the sound cards in this way several times, lay the five cards on the table. Say a sound out loud and ask your child to point to the card with the letter that makes that sound. Next switch roles and have your child call out a sound and you pick up the card.
Continue to practice your five sound cards for 10 – 20 minutes a day until your child can easily say the sound when you hold up the letter.

All Kids Learn Differently
Some kids will know these five sounds after one session and other kids might need a month to know them. This does not mean one child is smarter than the other child.
It just means all kids are different and learn differently. This is an important concept to understand.
Kids that have trouble remembering the sounds feel like they are not smart and this is NOT true. They are smart, their brain just learns differently.
If your child is an outside the box learner and is having trouble learning the five sounds choose a few multisensory methods to learn the five sounds.
When your child knows the five sounds easily move on to Step 2.

Phonics Blends
Now you are ready for Step 2!
Lay down the sound card for “a” and say the sound out loud. Next, lay doen the sound card for “p” right next to the “a” card and say the /p/ sound while you are laying down the card.
Tell your child that now we are going to blend two sounds together like we are making a sound train. This is the “ap” train and it sounds like /ap/ (say the sounds together). Write a new sound card that has “ap” written with the letter “a” in red and the letter “p” in black. Practice saying this new sound card with your other sound cards.
When your child is comfortable with this new blended sound card, add the next one, “am”. Introduce this sound card in the same way as above and make a new sound card with the “am” sound. Practice this sound card along with all the other sound cards.
When your child is comfortable with “am” add the next sound card, “at” and then later the final sound card, “as”.
Take as much time as your child needs when introducing the new sound cards. Always continue to practice the individual sounds as well.
You can make each “sound train” both ways, by connecting the two individual sound cards together and by just showing the one card with both sounds written on one card.
This activity gets your child used to the idea that we can combine different sounds together and make new combination sounds.
Great job! You finished Step 2. On to Step 3, making words.

Making Words
Step 3 – Making words is fun!
Tell your child that now you are going to make some words by combining your sound cards with your sound trains. Some words will be real words and some words will be pretend words. The pretend words will make up bigger words later on.
Each sound train can make four words by using the four consonant sounds. For example, the “ap” sound train will make: map, pap, sap and tap.
First, place your “ap” sound train card down and practice the sound out loud. Add the “m” sound card in front of the “ap” sound train.
Blend the sounds together slowly and then a little faster, “m” ,”ap”, “map”. Once your child gets the idea that this is how you make and blend a word, write the new word on a card and add it to the rest of your cards.
Now you have individual sound cards, blended sound cards/sound trains, and word cards, both pretend and real words.
This step can take a little while to master at first. Once your child gets the idea of blending the sounds it becomes way easier with each new blend.
Take your time. You don’t want your child to get frustrated. If it seems difficult, introduce the sounds and blend them together and then put it away for another time. Each session will get easier.
Once you have completed all the words with the “ap” sound train move on to the “am” sound train and repeat the process.
Next do the “at” sound train and finally the “as” sound train. A word of warning here. The “as” sound train will sound like “ass”. It never fails to make the kindergarten kids laugh. Just remind them it’s another name for a donkey and move on.
Make word cards for all the words you make with each sound train and add them to your sound card practice routine.

Reading Words
Step 4 – Read all the words you make. Practice, Practice, Practice. You should have all of the following sounds and words on cards: a, p, s, t, m, ap, am, at, as, map, pap, sap, tap, mam, pam, sam, tam, mat, pat, sat, tat, mas, pas, sas, tas. Continue to practice reading all of the cards. If you notice an area of difficulty, redo that sound train again. Eventually, all the cards will be easy to read.

Make A Book
Now for Step 5 – Writing. Great work! You made it this far and your child is learning to read! Now it’s time to write. Writing will help your child learn to read better and reading will help your child learn to write better. They go together.
You can combine the words your child learned and make a book of words and sentences for your child to read.
Lay out all of your cards on the table. Practice reading all of the cards one at a time. Show your child how you can combine a couple of cards to make a sentence. Move the cards around to make several different sentences.
For example, “Sam sat.” “Pam sat.” “Pam sat at a mat.” These will just be silly sentences at first because you don’t have a big variety of words yet.
Write any sentences you make on separate index cards. Each sentence should be written on a separate card.
Have your child copy each word and sentence on to another card for making a book. Your child can draw a picture about the word or sentence on the card. Use a hole punch to make a hole in the top left corner of each card. Use a binder ring to join the cards together in a book. Practice reading the book along with the other index cards.
This activity shows your child how to begin to form and read words and sentences. The words and sentences can then be combined to make and read books.

Congratulations! You did it! You taught your child how to read!
Now that you are a pro at all this learning to read stuff, move on to the next level. You can find level 2 here.
Teaching your child to read is one of the greatest gifts you can give him or her. Your child will use this skill in all learning endeavors for the rest of their life and you were able to be a part of that learning process. You should be proud!